 SurveyorSim
student guide · getting started
Getting into your class
You need two codes and a PIN you choose yourself. That is the whole system — there is no password to invent and no account to create. This page takes you from there to your first measurement: signing in, getting out onto the site, setting up the instrument, and taking a shot. If something has gone wrong, skip to the end.
Your two codes
one is yours, one is everyone'sPeople mix these up. The sign-in box does catch it — type a 6-character code into the personal box and it will say so — but knowing which is which once is faster than being corrected twice.
Your personal code — 8 characters
H7QM2PXRYours alone. Your instructor either hands you a printed slip or emails it to you. It is what proves the seat on the roster is yours, and you use it every single time you sign in. Do not pass it to a classmate — anyone holding it can sign in as you.
The class code — 6 characters
AB3K9ZThe same for everybody in the class. Your instructor usually puts it on the board. It is also printed on your slip and in your email, and it is inside the sign-in link if you were sent one. It says which class — on its own it lets nobody in.
It can change. Because it is public — on a board, in a photo — your instructor can replace it at any time. When they do, the old one stops working straight away, along with any sign-in link they emailed you earlier. Your personal code is not affected. See when something has gone wrong if that has happened.
The first time you sign in
you choose the PIN- Open the classroom and choose I'm a student. (Or click the link in your email, which skips the next step.)
- Enter the class code — the 6-character one.
- Enter your personal code — the 8-character one. The screen then greets you by name.
- Check that the name is yours. If it is not, use Not you? Use a different code rather than carrying on — you would be claiming someone else's seat.
- Choose a 4-digit PIN. You are making this up right now; nobody issued it. Pick something you will remember, and do not use a classmate's.
- Press Claim my seat. That seat is yours from then on.
Signing in after that
same codes, plus your PINEvery later sign-in is the same three things: the class code, your personal code, and the PIN you chose. The button says Sign in rather than Claim my seat once the seat is yours.
On a computer you share — a lab machine, a library desktop — use Sign out on this device when you finish. Closing the tab does not sign you out, and the next person to open it would be looking at your class.
Getting out into the field
the sim itselfOnce you are in, your class page lists whatever your instructor has posted. Open an assignment and it takes you to the site set up for it, with the task on screen.
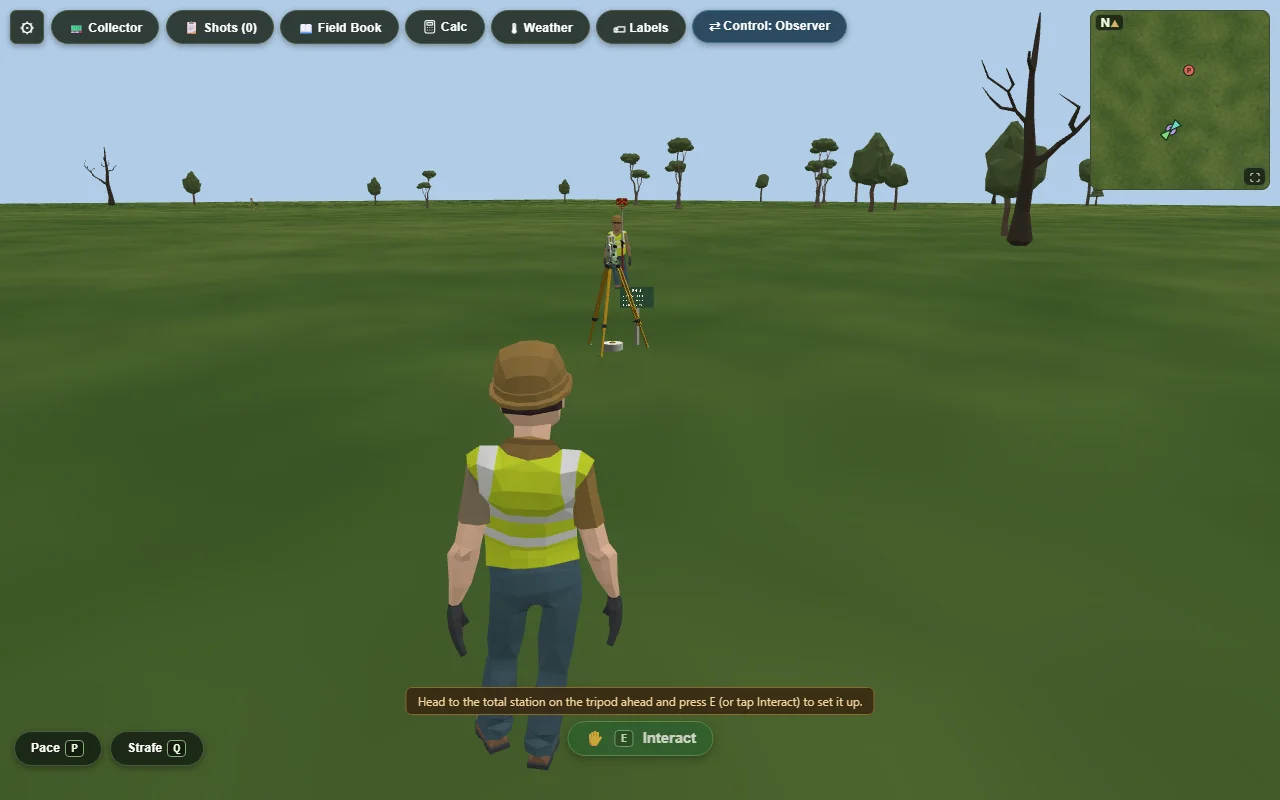
If nothing is posted yet, Open the simulator (free play) gives you the full kit on a practice site — the same instruments, no grading. It is the right place to get used to the controls before a graded lab. When you want to go back, the simulator's opening screen carries a Back to my class button.
Your first setup
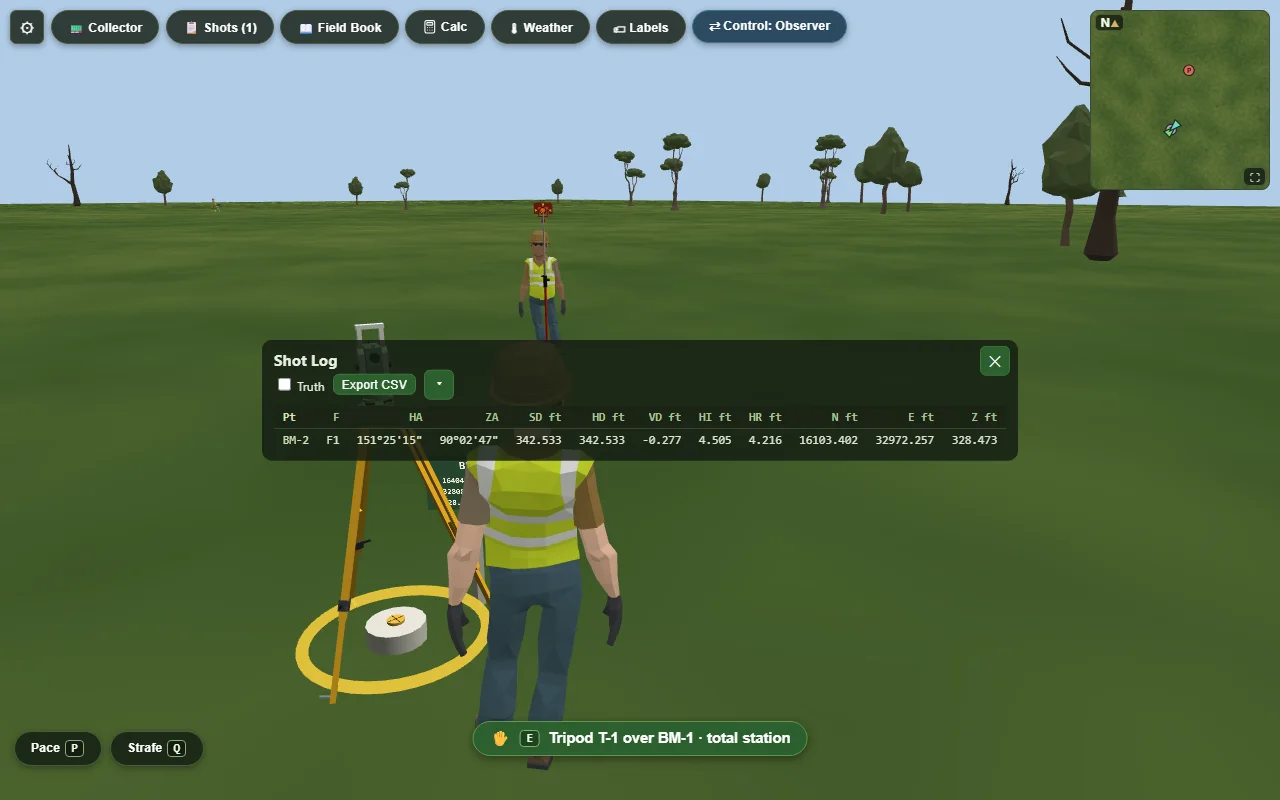
nothing is set up for youOn a graded site there is no instrument standing ready: you carry one out and set it up, in that order, the same as on a real site. Free play is different — it starts you with a total station already on its tripod over BM-1, so you can get straight to the setup itself. The picture above is free play, which is why there is one standing in it.
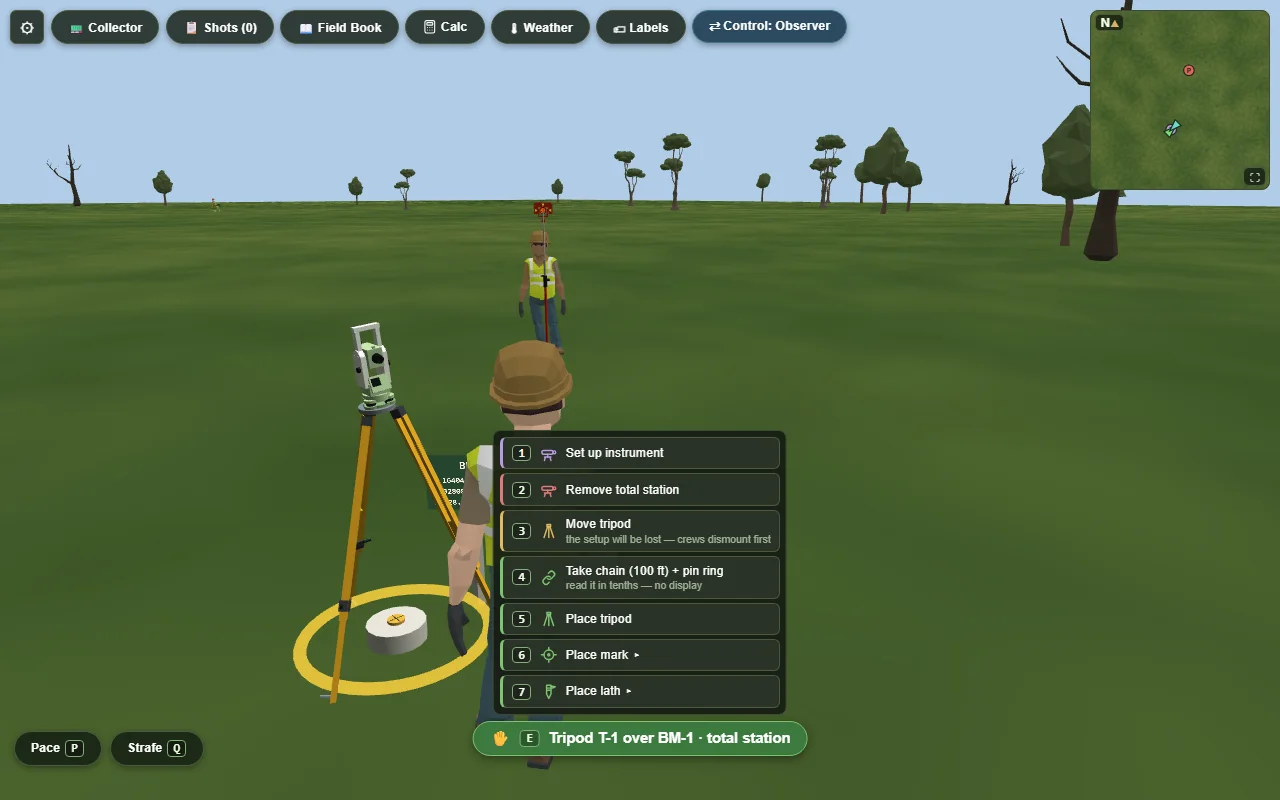
- Stand at the mark and press E to open the interact menu. Choose Place tripod — it plants where you are standing. There is no truck to walk back to; your kit is always with you.
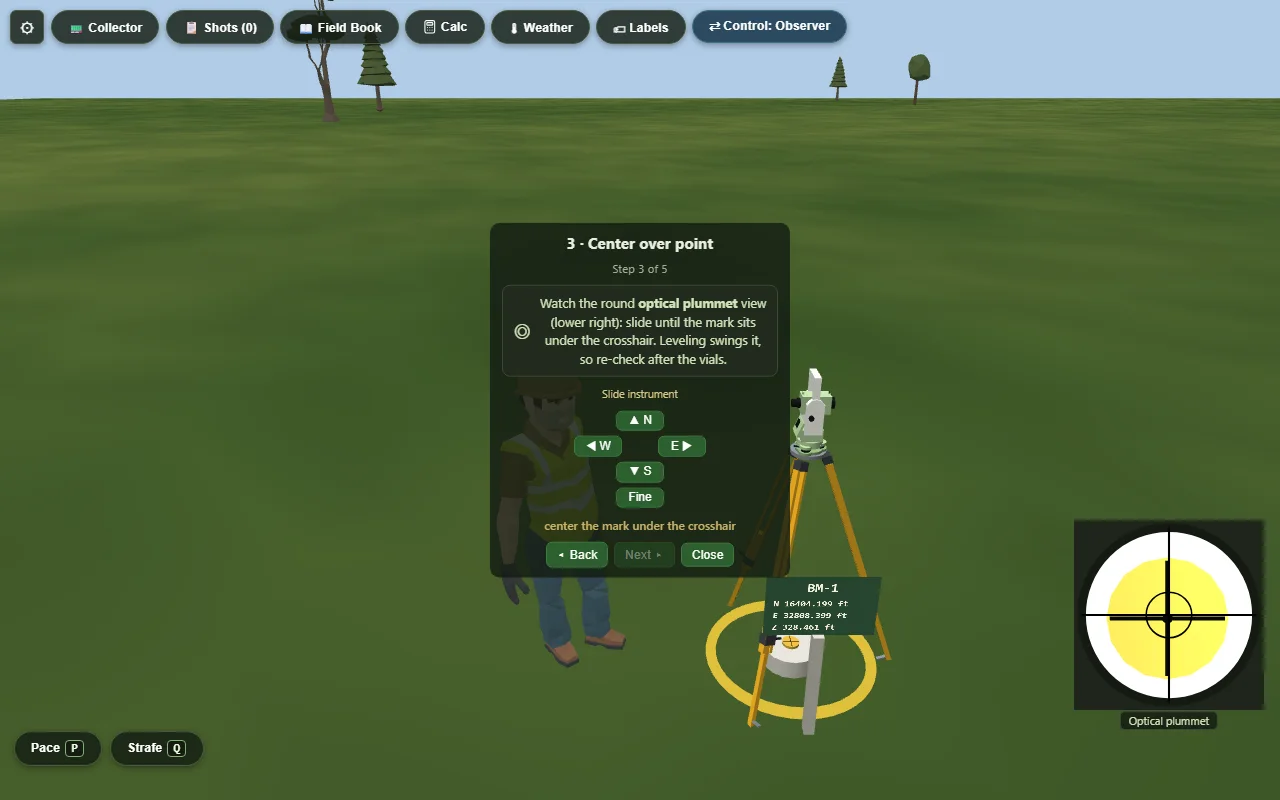
- Press E once more and mount the instrument on it. The guided setup panel opens by itself.
For a total station the panel walks you through five steps: spread the legs, rough-level, centre over the mark with the plummet, fine-level on the footscrews, and measure your height of instrument.
Your first shot
find it, then centre it- Get to the eyepiece. At a total station press T. At an auto level walk up to it and use the interact menu — the level has no hotkey.
- Find the target with the rough sight first. Press V to swap to it. The telescope's field of view is far too narrow to search with, and hunting through it is the single most common way to waste ten minutes here.
- Swap back to the telescope with V and centre the crosshairs. Drag to aim, arrow keys for the last of it.
- Press Measure. It is the on-screen key under the display — there is no keyboard shortcut for it. Click it, or Tab to it and press Enter.
The shot lands in the Shot Log by itself. It does not land in your field book — you write that yourself, and on a graded leveling assignment the book is what gets marked. Your records explains why that distinction costs people marks, and which record is marked on the other exercises.
Reading the screen
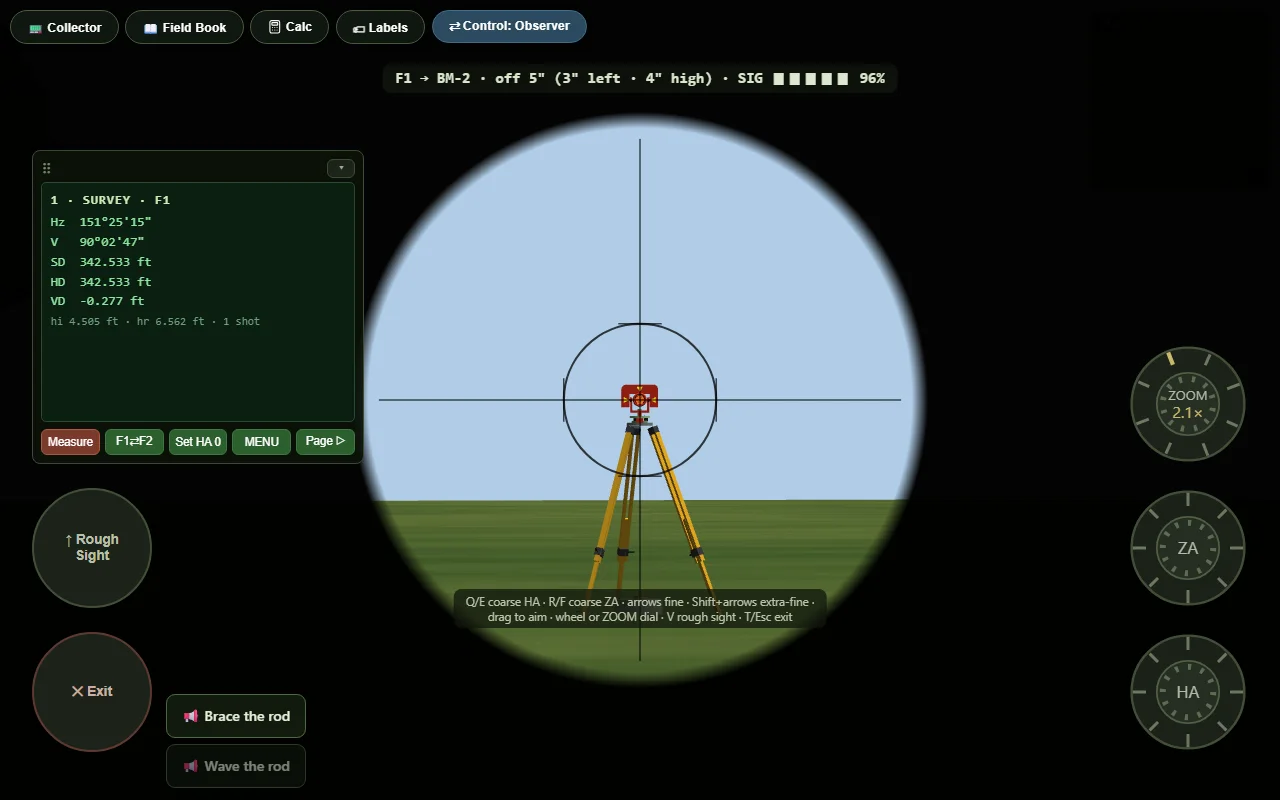
two names, one measurementThe instrument display uses the manufacturer's labels and your field book uses the textbook's. They are the same measurements.
| On the instrument | In your book | What it is |
|---|---|---|
| Hz | HA | The horizontal angle — the circle reading. |
| V | ZA | The zenith angle. 0° straight up, 90° horizontal. |
The rest of the readout is distance: SD along the sight line, HD flat, VD up or down.
When something has gone wrong
most of it your instructor can fix in seconds"It says my code isn't recognised."
Check which box is complaining before you check anything else — the two codes fail in completely different ways, and the fixes have nothing in common. If it is the personal-code box, this is usually the two codes swapped: the class code is 6 characters and that box wants your 8. If it really is your personal code, ask your instructor to look it up — they can see it and reprint it, and doing so disturbs nobody else in the class. If it is the class-code box, read the next paragraph rather than counting characters.
"The class code doesn't exist any more — and my instructor gave it to me."
Your instructor has replaced the class code, which they can do at any time because it is public. That is not a mistake on your part and nothing is wrong with your account. The old code died the moment they replaced it, and so did any sign-in link they emailed you before then — which is why a link from your own instructor can lead to "no class with that code". Ask them for the new 6-character class code, or watch for a fresh email. Your personal code and your PIN are unchanged, and so is all of your work.
"I've lost my slip."
Ask for another. A reprint gives you the same code back, so there is nothing to re-do and nothing else changes.
"I've forgotten my PIN."
Use Forgot your PIN? on the sign-in screen. That flags it for your instructor to see next time they open your class — it does not email anyone, so tell them too if your lab is sooner than that. They will reset it and give you a new personal code: the old slip stops working, which is the point. Your work stays exactly where it is.
"It greeted me with somebody else's name."
Do not continue. Use Not you? Use a different code on that screen, or This isn't me — sign out and start over if you are already in. Then check you are holding your own slip rather than a neighbour's.
"I'm not on the roster at all."
Tell your instructor your name is missing. Adding you takes one line and produces your slip; nobody else's code changes.
“It says too many wrong PINs.”
After five wrong PINs in a row the seat locks for fifteen minutes. Nothing is broken and nothing is lost — the clock simply has to run down, and the screen's “try again in a few minutes” is understating it. Forgot your PIN? does not unlock it either; that only flags your instructor. If your lab is happening now, tell them — a PIN reset clears the lock immediately.